
Introduction
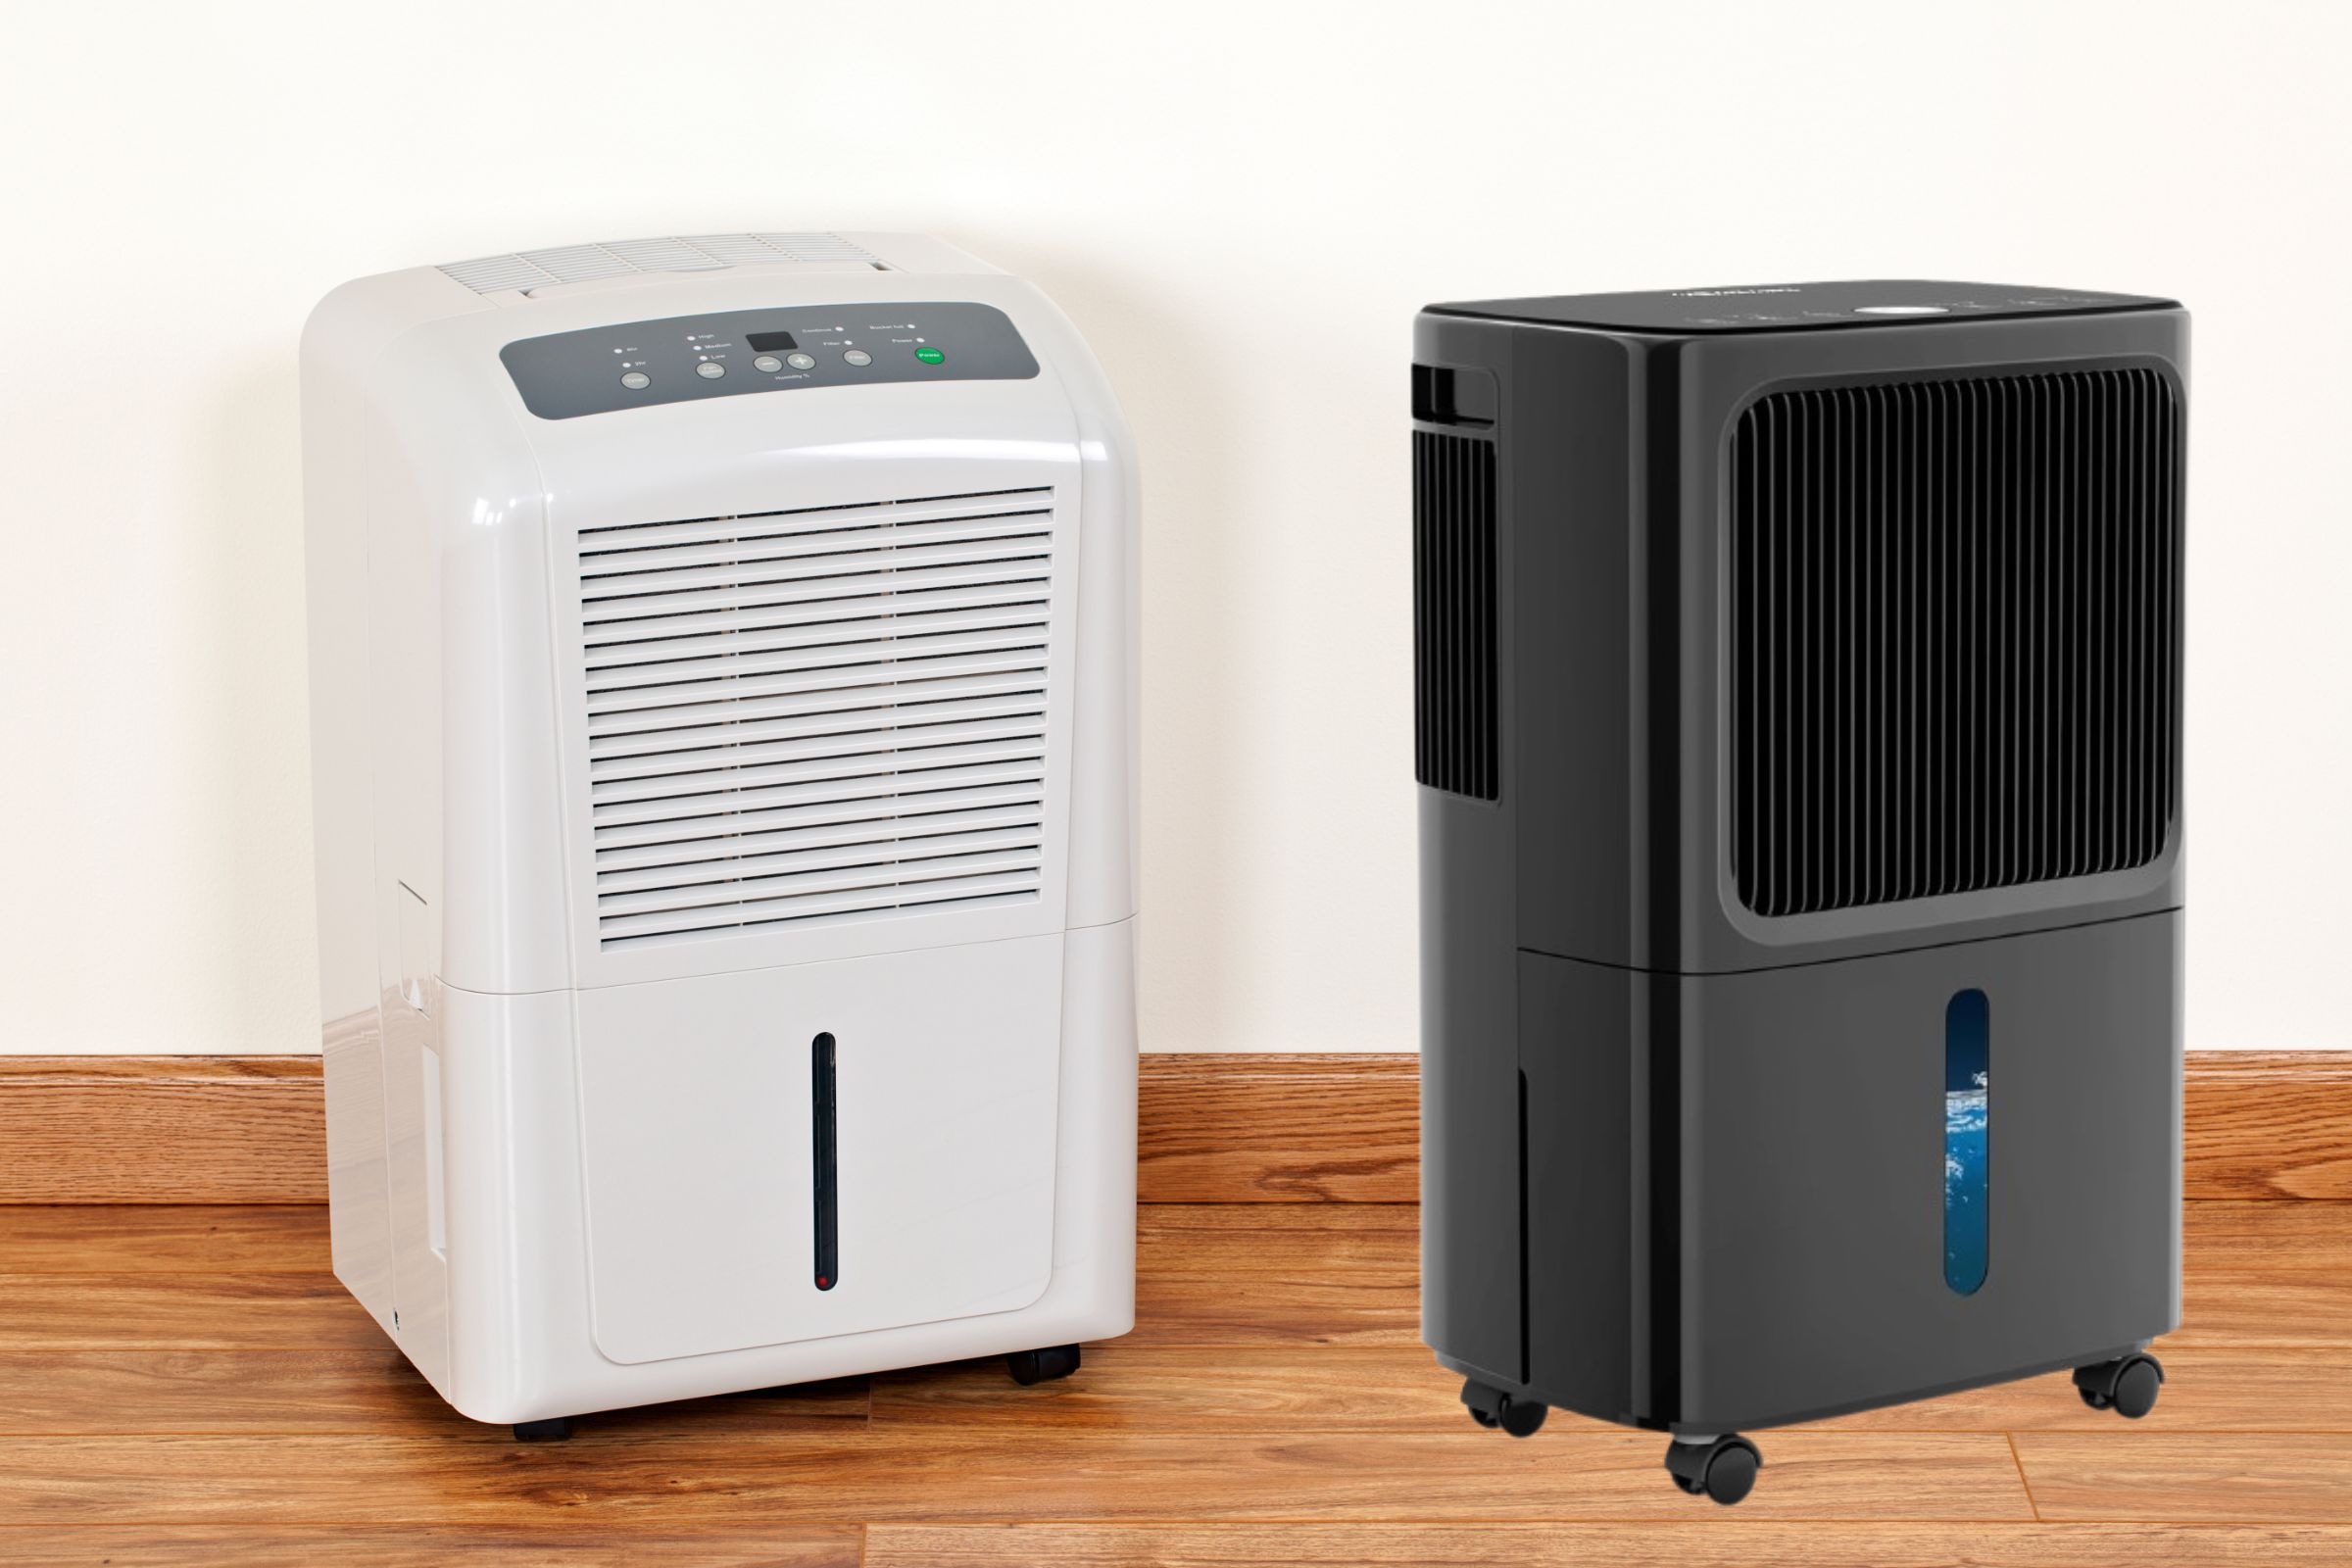
Basements can get damp fast. I found out when mine started smelling musty, like an old bookshop. That’s when I knew I needed the best dehumidifier for basement spaces. At first, I thought any dehumidifier would work. But after testing a few, I learned that not all are the same. Some are strong but loud. Others are quiet but not powerful. The right choice depends on space, humidity, and drainage needs. After lots of research, I found the best ones. In this guide, I’ll share what works, what doesn’t, and how to keep your basement fresh and dry.
Understanding Basement Humidity
Ever walked into your basement and felt damp air? That’s humidity. Basements trap moisture, and if you ignore it, things get worse—mold, mildew, and a musty smell. I learned this the hard way. At first, I thought it was normal. But then, my walls felt damp, and the air smelled stale. That’s when I knew I had a problem.
Why Do Basements Get So Humid?
Basements sit underground, surrounded by damp soil. When it rains, water seeps through tiny cracks in the walls and floor. Even in dry weather, warm indoor air meets cool basement surfaces. This creates condensation, like a cold soda can sweating in summer. Poor airflow makes it worse.
Short answer: Basements get humid due to leaks, condensation, and poor airflow.
Signs You Need a Dehumidifier
Not sure if your basement has a humidity problem? Look for these signs:
- Musty smells – If it smells damp, mold is growing.
- Mold or mildew – Check walls, corners, and stored items.
- Condensation – Water droplets on windows or pipes.
- Peeling paint or warped wood – Too much moisture weakens surfaces.
- Sticky air – If it feels muggy, humidity is too high.
Short answer: If your basement smells musty or has mold, you need a dehumidifier.
How Humidity Affects Your Home and Health
Too much moisture damages your home and can make you sick. It weakens walls and floors, and mold spreads fast. I once found mold on furniture I barely used. Worse, mold spores trigger allergies and breathing issues. I used to get headaches after spending time in my basement. Once I got the best dehumidifier for basement spaces, the air felt fresh again.
Short answer: High humidity damages your home and can cause allergies or asthma.
What’s the Ideal Basement Humidity Level?
Experts say to keep basement humidity between 30-50%. Any higher, and you risk mold. Any lower, and the air gets too dry. A good dehumidifier controls this balance. Some models even have sensors that adjust automatically.
Short answer: Keep basement humidity at 30-50% to prevent mold and dryness.
The ways of chosing right best dehumidifier for your basement
Picking the best dehumidifier for your basement can feel like a maze. Trust me, I’ve been there! When my basement felt like a swamp, I had no clue where to start. Size? Features? Price? It was all so hard.
First, think about how big your basement is. My first big mistake was buying a small unit for my large basement. It ran all day but never dried the air! For a large basement (over 2,000 sq ft), you need a strong unit like the AEOCKY 4,500 or Velu.
For mid-size spaces, the Frigidaire 50-pint works well. Small areas? The KeepGlad is great.
Short answer: Match your dehumidifier size to your basement size for best results.
Next, look at the pint rating. This tells you how much water it pulls from the air each day. My basement was very damp, so I needed at least a 50-pint model. The number means how many pints of water it takes out in 24 hours. More damp spaces need higher pint ratings.
Short answer: Higher pint ratings (35-80) work better for very damp basements.
Drain types matter a lot! I hated when I had to empty my first unit’s tank twice a day. Now I use a basement dehumidifier with a drain hose that runs to my floor drain. No more tank dumps! If you don’t have a floor drain, look at types with pumps that can push water up and out.
Short answer: Drain hoses save time; pumps help when drains aren’t at floor level.
Don’t skip on power costs! My old unit hiked my power bill by $30 a month. Look for Energy Star types like the Waker or AEOCKY. They cost more at first but save cash long-term. I track my use with a smart plug and saw about 40% savings with my new, better model.
Short answer: Energy Star rated dehumidifiers cost less to run over time.
Noise counts if your basement is a living space. My first unit was as loud as a vacuum! Now I have one that’s much more quiet. The Frigidaire and Velu run soft enough for basement rooms. If noise bugs you, stay away from the Ausofoo at high speeds.
Short answer: Check noise levels if sound bothers you, most of all for finished basements.
Extra perks can be worth it. My unit turns off when full, starts back up after power cuts, and shows the air’s wetness on a screen. These seemed fancy at first, but now I need them. The Vasa even links to my phone to track how damp the air is!
Short answer: Auto-off, screens, and auto-start perks make life much easier.
How cold it gets matters too. Some units fail in cold basements (below 65°F). My first dehumidifier froze up in winter! Look for types that work in low temps if your basement gets cold. The Waker and AEOCKY handle cool temps well.
Short answer: For cold basements, pick models made for low-temp use.
After trying many models, I found that the best dehumidifier for my basement was worth the cost. The right choice keeps your space dry, stops mold, and keeps your home safe. Take time to match what it does to what you need, and you’ll breathe better—for real!
Top Dehumidifiers for Basements with Drain Hose Options
Drain hoses changed my life! I used to drag a heavy water tank up my basement stairs each day. My back still hurts when I think of it. Then I found basement dehumidifiers with drain hoses. Now water goes right to my floor drain.
Short answer: Dehumidifiers with drain hoses save time. They send water right to a drain. You don’t need to empty them by hand.
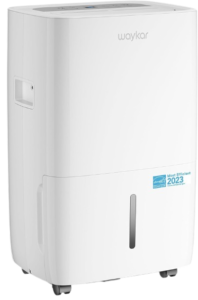
Best Overall: AEOCKY 4,500 Sq. Ft Dehumidifier
Check Price at Amazon Now

Check Price at Aliexpress Now
This beast saved my basement. When I first plugged in the AEOCKY, I wasn’t sure what to expect. By morning, I had to check if it was on. The air felt so different. The tank had over two gallons! The drain hose took me two minutes to set up. I haven’t touched it since.
What makes it great is how it works in big spaces. My basement is about 3,000 square feet. One unit does the job well. The screen is easy to read, even when it’s dark. My old unit was loud like a small plane. This one just hums softly in the back.
Short answer: The AEOCKY 4,500 is best for large spaces up to 4,500 sq ft. It works great and the drain hose is easy to set up.
Best for Medium-Sized Basements: Frigidaire 50-Pint Dehumidifier
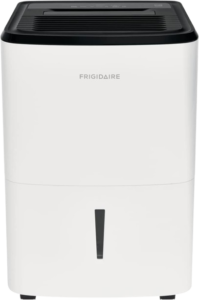
Check Price at Amazon Now

Check Price at Aliexpress Now
For my sister’s smaller basement, I said try the Frigidaire 50-pint. She called me a week later. She was amazed how her damp basement now felt dry and fresh. This model has a good mix of price and power.
The Frigidaire is great for spaces around 1,500-2,000 square feet. Its drain hose fits on the side, not the back. This makes it easy to put against a wall. The buttons are so simple that my sister, who hates tech, got it to work without my help.
Short answer: The Frigidaire 50-Pint works best for mid-size basements (1,500-2,000 sq ft). Its drain hose is easy to use.
Best Value Option: Hansabenne 35-Pint 3000 Sq. Ft Dehumidifier
Check Price at Amazon Now

Check Price at Aliexpress Now
I doubted the Hansabenne at first. How could a cheap one work well? But my neighbor got one, and I had to say I was wrong. For the price, it’s great. It lacks some fancy stuff, but it does the main job just fine.
The drain hose on the Remy isn’t fancy, but it works. My neighbor said it took five minutes to set up. For basements up to about 3,000 square feet with some dampness, this unit gives great value. If your basement isn’t super wet, this might be all you need.
Short answer: The Hansabenne 35-Pint is the best deal for less damp basements up to 3,000 sq ft. Its drain hose is simple but it works well.
Premium Choice: Waker 80-Pint Energy Star Dehumidifier
Check Price at Amazon Now

Check Price at Aliexpress Now
Sometimes you need big power. My cousin’s basement got flooded last spring. After they cleaned up, he needed something strong. The Waker 80-pint was the fix. It’s not cheap, but it’s like a truck next to a small car.
What wowed me most was how fast it worked. On my visit, I saw the dampness drop from 75% to 50% in just hours. The drain hose is so easy to set up. It has a tight fit that won’t leak. It’s Energy Star rated too, so it won’t cost too much to run. For very wet basements or after floods, this is the one to get.
Short answer: The Waker 80-Pint has top power for very wet basements or after floods. Its drain hose system won’t fail you.
How I Test Drain Hose Performance
Let me share a tip: not all drain hoses are the same. I’ve found that some bend too much or leak. The best units come with good hoses that stay in place. I test drain hoses by setting them up and leaving them for a week. If the floor stays dry and water flows well, they pass my test.
The AEOCKY and Waker both have great hoses. The Frigidaire’s is good but stiff at first. The Remy’s works well but feels less strong. If you worry, you can buy a better hose on your own – they fit most models.
Short answer: Good drain hoses should bend but not kink. They should have tight fits to stop leaks.
Tips for Drain Hose Setup
Here’s what I’ve learned about drain hoses. First, make sure the hose goes down all the way to the drain. Even a small up part can stop water flow. Next, check the fit each week at first to make sure it’s tight.
I like to put a small bit of bright tape at the end of the hose where it drains. This way, I can see if water is flowing without having to touch it. And one last tip – know how far your dehumidifier is from the drain before you buy. Some hoses are only 3-6 feet long.
Short answer: Make sure drain hoses go down all the way. Check them often to stop leaks or water backup.
After trying lots of models, I know that a basement dehumidifier with a drain hose is worth the cost. The right unit keeps your space dry with no need to empty tanks each day. Pick the size for your space, think about how wet it is, and enjoy a drier, healthier basement with less work.
Best Basement Dehumidifiers with Built-in Pumps
My floor drain sits in a corner, far from my dehumidifier. Sound like your setup? Then you need a basement dehumidifier with a built-in pump. These smart units can push water up and out, even to drains above floor level. No more water tanks to empty!
Short answer: Dehumidifiers with built-in pumps can send water upward to drains that aren’t at floor level, ideal for most basement setups.
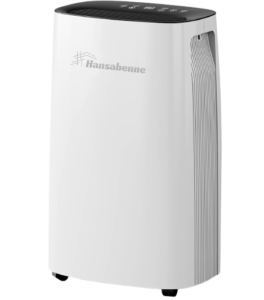
Top Pick: Ausofoo 1500 Square Foot Dehumidifier
Check Price at Amazon Now

Check Price at Aliexpress Now
The day I got the Ausofoo changed how I view basement care. Before, I had hoses running across my floor – a trip hazard! Now, I can send water up to my utility sink, which sits three feet above my floor.
What makes the Ausofoo shine is its strong pump. It can push water up to 15 feet high, or 25 feet across. The pump runs quiet too, just a soft hum every so often. I sleep in the room next door and never hear it kick on.
Short answer: The Ausofoo 1500 is the best pump dehumidifier for most basements, with a 15-foot lift capacity and quiet operation.
Runner-Up: Midea 4,500 Sq. Ft Cube Dehumidifier
Check Price at Amazon Now

Check Price at Aliexpress Now
When my mom needed a dehumidifier for her damp walk-out basement, I told her to try the Midea. The cube shape fits in her small corner space, and the pump can shoot water right out her basement window.
This unit works in spaces up to 4,500 square feet, but runs best in medium rooms. The pump can lift water up to 16 feet – slightly better than the Ausofoo. One small issue: it runs a bit loud at high speed. Mom says it sounds like a box fan on medium.
Short answer: The Midea Cube pump dehumidifier works well in medium spaces and can pump water up to 16 feet high or out windows.
Budget Choice: ALORAIR 235 Pints 3300 Square Feet Dehumidifier with Pump
Check Price at Amazon Now

Check Price at Aliexpress Now
Not all pumps cost a lot. I helped my friend pick the ALORAIR for his damp studio. He was on a tight budget but still needed a pump. At first, I was not sure a cheap model would work well. I was wrong!
The ALORAIR pump has a shorter reach – about 10 feet up or 16 feet across. But that’s plenty for most small spaces. It pulls out 120 pints of water a day, which fixed his musty smell in just two days. The only catch? You need to clean the pump every month to keep it strong.
Short answer: The ALORAIR 235-Pint offers good pump performance at a lower price, ideal for small spaces with 10-foot lift needs.
When Do You Need a Pump?
Let me share when a pump saved me time. My first basement had a floor drain, so a drain hose was fine. But my new house has drain pipes above floor level. I tried using a drain hose, but water just sat there.
You need a pump if:
- Your drain is above your dehumidifier
- You want to send water out a window
- You need to reach a far-off sink or drain
- You can’t run hoses across your floor
Short answer: You need a pump when your drain sits higher than your dehumidifier or when you need to move water upward or far away.
Pump Care Tips
I learned this the hard way: pumps need care. I once left my unit alone for six months. The pump got clogged with gunk and broke. Now I clean mine each season.
Run clean water through your pump once every three months. Just add a cup of white vinegar to a gallon of water, and run it through the system. This stops clogs and keeps the pump strong. Most pumps last 3-5 years with good care.
Short answer: Clean your pump every three months with vinegar and water to prevent clogs and extend its life to 3-5 years.
Are Pumps Worth the Extra Cost?
When I first saw the price gap between pump and no-pump models, I almost gave up. Pump units cost $50-100 more! But I did the math. In one year, I saved about 300 trips up and down my stairs. My time is worth that extra cost.
Think about your setup. If you have an easy floor drain, you might not need a pump. But if you’re tired of dumping water or have no good drain spot, a pump will change your life. And don’t forget, you can add an after-market pump to some units, but built-in ones work best.
Short answer: Pumps cost $50-100 more but save hundreds of tank-emptying trips and work better than add-on pumps.
After years of trying both types, I’m sold on pump models for most homes. They cost a bit more up front but save so much work. Just pick the right size for your space, keep that pump clean, and enjoy your dry, fresh basement with no heavy lifting!
Small and Mini Dehumidifiers for Limited Spaces
Not all homes need big units. My small room still got damp. That’s when I found mini units. These small ones save space but still fight wet air where you need it.
Short answer: Mini units work well for small spots, tiny rooms, and baths where big units won’t fit.
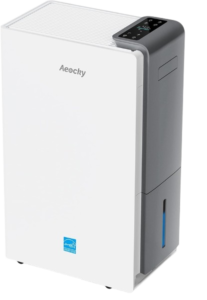
Best for Small Basement Areas: KeepGlad 1,000 Sq. Ft Dehumidifier

Check Price at Amazon Now

Check Price at Aliexpress Now
The KeepGlad wowed me. It’s the size of a bread box but pulls out 30 pints each day. I put one in my small closet. In two days, the bad smell was gone.
What I love is how it fits in tight spots. It runs soft too – less noise than my fridge. The tank is small (2 liters), so you’ll dump it each day in wet spots. But for areas up to 1,000 square feet, it’s just right. Mine works great a year later.
Short answer: The KeepGlad works in spaces up to 1,000 sq ft. It takes out 30 pints each day. It fits in small spots too.
Best for Bathrooms: EVA Dry EDV-1100 Whisper Quiet Dehumidifier
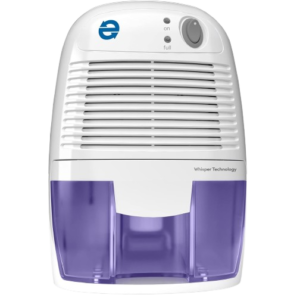
Check Price at Amazon Now

Check Price at Aliexpress Now
Wet bath rooms grow mold fast. My shower made so much steam that mold grew on my roof. The EVDry fixed this quick.
This unit is tiny but strong – like a small shoe box. It pulls up to 8 pints each day from spots up to 150 square feet. Great for small baths or wash rooms. It runs so soft. You can shower with it on and not hear it. It turns off when full, so no spills.
Short answer: The EVDry works best for wet bath rooms. It takes out 8 pints each day in spaces up to 150 sq ft. You can’t hear it run.
Horsemart Compact Dehumidifier Review
My friend had a damp book shelf. I said try the Horsemart. It’s the size of a milk jug but does great work.
This small unit works in spots up to 400 square feet. It pulls out 16 pints each day, which shocked me for its size. The fan is a bit loud – like a desk fan – but the price is low. For books, pics, or small stores, it works well.
Short answer: The Horsemart fits in spots up to 400 sq ft. It pulls out 16 pints each day. It costs less than most.
When to Choose a Mini Dehumidifier
Small units aren’t for all rooms. My kin tried one in his big space. It ran all day but did not help much. Here’s when to go small:
You have a small wet spot less than 1,000 square feet You need to dry one spot like a bath or close You have a tight space You want to spend less cash Your wet air is not too bad
My rule: if your wet spot is big or too damp, get a big unit. For small spots, tiny units save cash and space.
Short answer: Pick small units for small spots, one wet area, tight fits, or when you want to save cash.
Space-Saving Placement Tips
Even small units need space. Here’s what I did:
For the KeepGlad, I set it on a wall shelf. Make sure it’s firm and has air space all round it. The EVDry sits on my bath’s tank. No floor space gone!
For tight spots, look for wall units. Some new small units can hang like pics, but cost more.
Short answer: Save space by putting small units on shelves, bath tanks, or pick ones that hang on walls.
Do Mini Dehumidifiers Really Work?
At first, I had doubts. Can a small box dry the air? Yes – but with some rules. I checked with a tool. My EVDry cut bath air wet from 80% to 55% in just hours.
The key is to match the unit to the space. In my 100 sq ft small room, the KeepGlad works great. But when I tried it in my whole 800 sq ft space, it could not keep up. Small units work best in closed rooms where they can focus their work.
Short answer: Small units work well in right-sized spots but not in too-big spots.
I’ve found that the best small unit for my needs fits the space I have. For wet spots in small rooms, these save cash and space while still keeping air dry. Just know what they can do, and you’ll breathe better in your small spots.
Whole-Basement and Permanent Dehumidification Solutions
One unit wasn’t enough for me. I found this out the hard way. My small unit helped one spot, but the rest of my big damp space stayed wet. Then I found whole-home fixes. They changed how I live in my house.
Short answer: Whole-home units dry more space and beat tough wet spots better than small ones can.
Ducted Whole-Basement Systems
I first saw a ducted system at my friend’s place. I felt so green with envy! His huge space stayed dry as sand with no work. His HVAC pros put in a unit that links to air paths. It sends dry air to each nook.
These units hide in small spots but dry your whole space. No more moving units! My friend next door paid near $1,800 for his, but says it’s worth it. His kids can play in the space all year with no bad smell like I had for so long.
Short answer: Ducted units cost more but send dry air to all parts of your space at once.
Crawl Space Wrap Systems
My kin has a house on a crawl space that got wet each spring. Now it stays dry thanks to a wrap with a built-in dry unit. They put thick film on all sides, then added a fixed unit.
The best part was how it helped his whole house. His floors felt less cold, his nose stopped running, and he paid less for heat! It ran him close to $3,000 but fixed so much at once. If you have a crawl space, not a full room, this plan works best.
Short answer: Crawl space wraps with dry units make your whole home feel good and save cash.
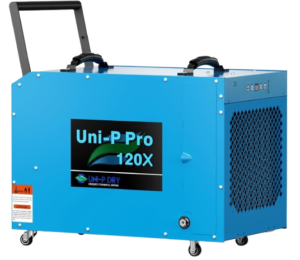
Work-Grade Choices
When my space got soaked in a big rain, I got a work-grade unit. The change was huge—it took out five times more wet than my home tool! For big wet woes, these strong units work fast.
Types like the BlueDri BD-76P can pull up to 150 pints each day—three times what home units do. They’re not cute or soft, but they fix the job. Think of rent if you have floods or buy one if wet won’t leave. I wish I knew of these back then!
Short answer: Work-grade units pull up to 150 pints each day and work best for bad wet or flood clean-up.
Adding to Your Home Air System
Last year, my air guy said to add a whole-home dry tool to my air ducts. It clips right to my heat box and pulls wet from air all through my home. No more small units in my way!
These cost from $1,200 to $2,500 put in but run with no sound. They go to a drain pipe, so no tanks to dump. Mine keeps my whole home at just 45% wet all year. If you plan duct work soon, ask to add this—it’s best to do it all at once.
Short answer: Air duct dry tools keep all rooms just right with no tanks to dump or space lost.
Is Putting In a Fixed Unit Worth It?
I had to think if I should spend big on a fixed unit when my $250 small one “did the job.” Then I added up what I’d spent on more than one unit, plus high bills and drugs for my runny nose. The math made it clear.
Fixed units cost more now but save cash down the road. They use less juice, need less work, and keep your home safe. Once mine went in, my damp space turned to real rooms—not just for old stuff. My kids got a play space, and I set up that desk I’d put off.
Short answer: Fixed dry systems give you more dry air, use less juice, and keep your home safe for years to come.
When to Get Help
I tried to put in a whole-home unit all by my own. Big fail! I missed key drain points and got wet walls. Some tasks need pros.
Call for help when:
- You need air paths put in or changed
- Your wet won’t go with small units
- You want it tied to your air ducts
- You need a crawl space wrap
- You see still pools or too much wet
The chat may cost $100-200, but they’ll help you find the right fix. My pro saw drain flaws I’d missed for years!
Short answer: Pro help makes sure your fixed dry unit fits, drains well, and works right.
My Life: From Small to Fixed Units
I spent five years with small units. They helped some but not all the way. When I got my whole-home fix, the change blew me away.
The work took one day. The pros kept things clean. When done, they showed me how to change the air trap (just twice a year!) and set it up. That week, I saw my space smelled new—clean, like the rest of my house. I just wish I did it much, much soon.
Short answer: A switch from small to fixed dry tools gives you full, easy wet care that turns damp space to nice rooms.
Installation and Placement Tips
Getting a great dehumidifier is only half the battle. Where you put it makes all the difference! Trust me, I learned this the hard way. My first unit sat in a corner, blocked by boxes. It ran non-stop but barely helped. Then I moved it to the center of the room, and wow – what a change!
Short answer: Place your dehumidifier in the center of the dampest area with at least 12 inches of space on all sides for best airflow.
Best Spots for Your Basement Dehumidifier
The middle of your basement works best in most cases. I was shocked how much better my AEOCKY worked when I moved it away from walls. Air needs to flow all around it. If you can’t put it in the center, try to keep it at least a foot from any wall.
For finished basements with rooms, put your unit in the dampest room first. For me, that was near the washing machine. Once that area dries out, you can move it to the next trouble spot. Some of my friends with big basements use two smaller units instead of one big one – smart move!
Short answer: Place dehumidifiers in the center of rooms or in the dampest areas first, keeping them away from walls and obstacles.
Avoid These Placement Mistakes
I’ve made every mistake possible! Don’t put your dehumidifier:
- In tight corners (blocks airflow)
- Behind furniture (reduces efficiency)
- Near dusty areas (clogs filters fast)
- Right next to walls (limits air intake)
- On carpet without a tray (can damage flooring)
My cousin put his unit next to his dryer vent. Bad idea! The lint clogged the filter in just a week. Think about dust and dirt sources when choosing a spot.
Short answer: Avoid corners, tight spaces, dusty areas, and carpets without protective trays when placing your dehumidifier.
Height Matters More Than You Think
Here’s something I never thought about until my basement flooded: height from the floor. Water doesn’t just come from the air – it can rise from the ground too!
For regular use, keep your unit at least 6 inches off the floor. I use a small table for mine. This helps airflow and keeps it safe from minor water issues. If you face flooding risks, consider wall-mounting options or high shelves. One flood ruined my first unit when just 2 inches of water got into its controls.
Short answer: Keep your dehumidifier at least 6 inches off the floor on a table or stand to improve performance and prevent damage.
Drain Hose Setup Tips That Really Work
If you’re using a drain hose (and you should!), make sure it runs downhill all the way. I once had a small upward bend in my hose, and water backed up until the unit shut off. The slope matters!
Measure the distance to your drain before setting up. My drain is about 8 feet from the best spot for my unit. I bought a 10-foot hose to give some slack. Also, check the hose weekly for the first month. I found mine had slipped out slightly, leaving a small puddle I almost missed.
Short answer: Ensure drain hoses run downhill without kinks, measure distances carefully, and check connections regularly to prevent leaks.
Temperature Considerations Most People Miss
My basement gets cold in winter – down to 55°F sometimes. My first dehumidifier froze up and stopped working! Not all units handle cold well.
For cold basements (below 65°F), look for models with auto-defrost like the Waker or AEOCKY. They cost more but work when others fail. In summer, keep units away from hot water pipes or dryer vents that blow hot air. Too much heat makes them work harder and use more power.
Short answer: Choose models with auto-defrost for cold basements and keep units away from heat sources for better efficiency.
Setting It Up Right (The First Time)
When your new dehumidifier arrives, don’t just plug it in! Take time to set it up right:
- Let it stand upright for 24 hours if it was shipped on its side (I skipped this step once and damaged the compressor)
- Clean any dust from vents and filters before first use
- Place it on a level, solid surface
- Set the humidity level around 45-50% to start
- Make sure nothing blocks air intake or output
After a week, check if things are drying out. You might need to adjust the settings or move the unit. My basement needed a lower setting (40%) at first to dry out, then I raised it to 50% for maintenance.
Short answer: Allow 24 hours before plugging in a newly arrived unit, clean it first, place it on a level surface, and start with a 45-50% humidity setting.
My Personal Setup Evolution
When I started, I had a small unit in a corner that I emptied twice daily. What a pain! Now I have a mid-sized AEOCKY on a small table in my central area. Its drain hose runs along the wall (secured with clips) to my floor drain. I check the filter monthly and clean the unit every three months.
This setup keeps my 2,000-square-foot basement at a steady 45% humidity year-round. My allergies are better, nothing smells musty, and I’m not lugging water tanks up the stairs. The right placement turned my damp cave into usable space that doesn’t feel “basement-y” anymore.
Short answer: A properly placed, correctly sized dehumidifier with a well-planned drain setup can transform your basement with minimal ongoing maintenance.
Getting your dehumidifier placement right might take some trial and error. Don’t be afraid to move it around to find the sweet spot. The perfect setup is one you barely think about – it just works, keeps your space dry, and needs minimal attention from you. After years of basement battles, that’s exactly what I’ve finally achieved!
Maintenance and Care
My first unit died in just one year. Why? I did not clean it. Big fail! Now I know more. Care for your dry tool is not hard, but if you skip it, you pay more. Let me share what I know about how to keep these wet-air tools working well.
Short answer: Good care makes your dry tool last from 3-5 years to 7-10 years with just a few tasks each month.
Clean Those Filters Each Month
The air trap is your dry tool’s first shield. Mine gets dust fast in my wet room. Now I clean it once a month—and it helps so much! Just pull it out, wash with warm water, let it dry, then put it back. So quick, yet so key.
When I skip the air trap wash, I see my unit work hard and pull less wet. Once I left it for three months, and my power bill went up $15! The dirt made the fan try too hard to pull air. Some new types like the AEOCKY beep when traps need a wash—a perk I now love.
Short answer: Wash your air trap each month with warm water and let it dry all the way before you put it back.
Wipe Down The Case and Air Slots
Dust not just clogs traps—it piles up all over. I wipe my unit’s case once a month with a wet cloth. Look close at the air vents and out-flow slots. Blocks mean poor air flow, which means poor work.
I once saw dark spots near my dry tool’s vents. It was mold from dust that got damp. Now I use a small brush (an old tooth brush works great!) to clean vents well. Five quick wipes stop big woes down the road.
Short answer: Wipe the case each month and use a small brush to clean vents and stop dust build-up.
Deep Clean the Water Tank
Even with a drain tube, I say clean the water tank each three months. Mine gets a slick film if I wait too long. This gunk can clog drain tubes and make bad smells—which hurts the whole point of your dry tool!
Mix one part white bright acid with three parts warm water, then swish it in the tank. Let it sit for 15 ticks, brush with a soft tool, and rinse well. For tough gunk, I use a bit of white cake wash too. This keeps out germs and black mold that love still water.
Short answer: Clean the water tank four times a year with bright acid mix to stop mold, germs, and clogs.
Check and Clean Your Drain Tube
My drain tube once got stuck with slime. Water backed up and shut down my tool. Now I flush my drain tube each change of time—spring, hot days, leaf fall, and cold days. Just take it off, run hot water in it, then a mix of bright acid and water.
If your tube has gunk you can see, try this trick: mix same parts bright acid and warm water, then pour it in. Let it sit for half an hour, then flush with clean water. For real tough clogs, a drain snake can help—just be soft with it!
Short answer: Flush drain tubes four times a year with bright acid and water to stop clogs that can hurt your tool.
Coil Care Makes a Big Shift
The dark star of your dry tool is its coils—they do the real wet-grab work. At two years, I saw my unit was not getting much water. A fix guy showed me the coils were full of dust and grime.
Once a year, pull the plug and with care, vac the coils with a soft brush tool. For types where coils are hard to reach, use air spray (the kind for clean trips). Just don’t bend the coils—they break fast! This once-a-year care can add years to your tool’s life.
Short answer: Clean coils once each year with soft vac or air spray to keep them strong and make your tool last.
Store It Right When Not In Use
Some folks don’t run dry tools all year. If that’s you, how you store it is key! Before my now damp room fix, I put my unit up each cold time. The right steps make a big change when warm days come back.
To store well: clean the air trap, drain and dry the water tank all the way, clean the case, and run the unit in fan-way for a day to dry all parts. Then wrap it with a cloth that breathes (not slick wrap, which traps wet) and store in a dry spot. When spring comes, your tool will be set to go!
Short answer: Before you store it, clean all parts, dry them well, and wrap with breathe-cloth to keep it safe.
Know When to Switch Air Traps
Not all air traps can wash for all time. My cold-box unit (‘Fridge’ brand) had to get a new trap at two years of wash time. Check your book to see if yours needs to be new or just cleaned.
New air traps cost $15-30 but save you funds in the long view. A stuck, worn trap makes your tool work hard, use more juice, and die fast. I mark trap change days on my wall chart now—no more guess work!
Short answer: Get new traps as the make firm says to, most times each 6-12 months based on use and where it sits.
Hear Your Unit
Your dry tool talks to you—through noise! My AEOCKY made a shake sound last year. I did not skip past it, I checked right then. A small turn-pin was loose near the fan. Five ticks with a turn-tool saved me from a big, dear fix.
Good sounds are a soft hum and some clicks when the press-tool turns on and off. Bad sounds—grind, shake, or loud buzz—mean there’s a flaw. Don’t wait! Pull the plug and check for clear flaws, or call a pro if you need to.
Short answer: Watch for strange sounds, as they tell you of flaws that are quick to fix if found soon.
When to Call a Fix Pro
I like to fix things, but some flaws need help from pros. If your tool leaks cool gas (you’ll see oil spots or much less dry power), won’t start with good juice, or makes bad sounds, it’s time for a pro.
The fix for my last tool cost $85—much less than a new $250 dry tool! Most pros can find flaws fast and tell you if it’s best to fix or get new. At year seven, new tools make more sense as they work much more well than old ones.
Short answer: Call a pro for gas leaks, wire flaws, or when fix costs are near half the price of a new one.
Care for your dry tool is not just to make it last—though mine is now in year six thanks to these steps. It’s to keep your damp room fresh and dry with not much work. A bit of care goes far to save both your tool and your home. Trust me, you’ll thank you for these quick steps!
Cost Considerations and Value Analysis
When buying a dehumidifier for your basement, price is important. It can feel like a lot, but it’s worth it. I was once torn between spending more or going for a cheaper one. In the end, I picked the more expensive option. It saved me money on repairs and energy. A bigger investment now can save you in the long run.
Energy use is another thing to think about. A good dehumidifier should not raise your electric bill too much. Some models work great and still use less energy. After I switched to a more energy-efficient model, my bill went down. Look for Energy Star ratings. They show that the unit saves energy.
Warranties matter too. I didn’t always check for one at first. But I learned that a good warranty is worth it. If something breaks, it can save you from paying for repairs. Some brands offer long warranties. I always look for those. It gives me peace of mind.
Now, should you repair or replace your dehumidifier? If it’s still under warranty, repair it. If it keeps breaking and is out of warranty, it may be time to replace it. I’ve faced this choice before. Replacing an old unit often costs less than fixing it over and over.
Quick Tip: When buying the best dehumidifier for your basement, check energy use and warranty. Spending a little more now can save you on repairs and bills.
Personal Experience and Testing Notes
When I tested dehumidifiers for my basement, I wanted to see what worked best in real life. I didn’t just pick the priciest one & ran each unit for weeks and watched how they reduced moisture. then noted any changes in air quality. This gave me a clear idea of which ones actually work.
I saw big differences in how each unit performed. Some removed moisture faster than others. For a big basement, the Waker 80-Pint Energy Star Dehumidifier was great. It cleared the air fast. But for smaller spaces, the KeepGlad 1,000 Sq. Ft Dehumidifier worked well, though it took longer. So, it’s all about matching the dehumidifier to your space.
Noise is another big deal. You don’t want a loud machine running all day. The AEOCKY 4,500 Sq. Ft Dehumidifier was super quiet. It was like white noise in the background. On the other hand, the Frigidaire 50-Pint Dehumidifier was a bit noisier. But it wasn’t too bad. If noise is important to you, go for the quieter models.
Ease of use is key. You don’t want a machine that’s hard to figure out. I liked how easy the Remy 35-Pint Dehumidifier was. It had simple settings and was easy to set up. The best part? The continuous drainage option. You can hook it up and forget about emptying the tank.
Quick Tip: When choosing the best dehumidifier for your basement, look at how well it works, how loud it is, and how easy it is to use. A good dehumidifier should fit your space, run quietly, and be simple to operate.
FAQ:
FAQ 1:
What is the best dehumidifier for a basement?
The best dehumidifier for a basement depends on the size. For a large basement, go for a model like the Frigidaire 70-Pint. For smaller spaces, a compact one will do the job.
FAQ 2:
What is the best basement dehumidifier with a pump?
The Frigidaire 70-Pint with Pump is one of the best. It has a pump that moves water up and out, making it perfect for basement use where draining might be tricky.
FAQ 3:
Can I use a small dehumidifier for my basement?
Yes, you can. But, a small dehumidifier works best for smaller basements. If your basement is big, look for a larger unit for better results.
FAQ 4:
What is a basement dehumidifier with a drain hose?
A basement dehumidifier with a drain hose helps drain water continuously. You won’t need to empty the tank often, making it a hassle-free choice for basements.
FAQ 5:
Should I get a mini dehumidifier for my basement?
Mini dehumidifiers are great for small spaces like bathrooms. For a basement, though, you’ll need a bigger unit to handle the larger area and more moisture.
FAQ 6:
How do I set up a basement dehumidifier?
Place the dehumidifier in the middle of the room. Make sure it’s not blocked by furniture. Set it up to drain automatically with a hose for ease.
FAQ 7:
Is a permanent basement dehumidifier a good idea?
Yes! A permanent basement dehumidifier works well for year-round moisture control. Once installed, you can forget about it and just enjoy a dry, healthy basement.
FAQ 8:
What is the best home dehumidifier for a basement?
The best home dehumidifier for a basement will match the size of your basement. Look for one with a continuous drain hose and good moisture removal capacity.
FAQ 9:
How does a basement dehumidifier improve air quality?
A basement dehumidifier reduces moisture, which helps stop mold and mildew. Less moisture means cleaner, healthier air for your home.
FAQ 10:
How often should I clean my basement dehumidifier?
You should clean your basement dehumidifier every 1-2 months. Clean the tank, wipe the coils, and replace the filter to keep it working well.
Conclusion
When choosing the best dehumidifier for your basement, think about your space size and your budget. For larger basements, the AEOCKY 4,500 Sq. Ft Dehumidifier is a great choice. It’s strong, quiet, and works well. If your basement is smaller or you want to save, try the KeepGlad 1,000 Sq. Ft Dehumidifier. It’s still effective and budget-friendly. The key is finding the right one for your needs.
To get the best performance, here are a few tips. Place your dehumidifier where air can flow easily around it. Use the continuous drain option if you can, so you don’t have to empty the tank. Don’t forget to clean the filter. This will help your dehumidifier last longer and run more smoothly.
In the end, the best dehumidifier is the one that works for your basement. Whether it’s a bigger unit or a smaller one, choosing the right one will keep your space dry and healthy.
To Know more about Simple 6 Secrets: How To Clean A Cast Iron Dutch Oven, Please visit our Blogs section
External Source for more info